After watching some amazing videos by Ben Eater about creating a computer on a breadboard with simple integrated circuits and then an 8-bit computer on breadboard using a 6502 microprocessor, I started playing around with a javascript emulator of his basic design. I was going to post it online, but I ran into a single problem of the math logic giving me a hassle. It was all but done. I never got around to fixing it, because I decided to take up a new hobby -- that of digital electronics. I always wanted to learn. Non-soldering breadboards now make it quite easy. So that's what I did.

I started with basic circuits, timers, and eventually decided to build an 8-bit computer. I didn't want to just copy what Ben Eater did, because how do you learn that way? No. I ordered the parts and did it my way. First, I used an Arduino Mega to emulate the crystal oscillator, RAM, and ROM, because I didn't want the processor running at full speed and I didn't want to program an EEPROM until I had sufficient code to put in it and I forgot to order the RAM (duh). I was also able to use the Arduino's serial connection to send keyboard commands to the processor. I eventually put the 32k RAM in place without much hassle. Stepping the clock with the Arduino made debugging so much better than what likely would have been.
I just kept improving from here. Next came the video output. I found some code to allow an ESP32 Microcontroller (which I had) to output a B&W composite signal to a TV. Perfect. I was able to interface the ESP32 with the microprocessor. Adding a new character to the screen was as easy and storing its ASCII value in a single memory address. It did take a while to tweak the code for better speed and functionality, but it works really well now. I next added a PS2 keyboard interface via an Arduino Nano. Yes, there are existing libraries to use a PS2 keyboard with the Nano. No, it did not use them. Whereas I used pre-made code for the video out since it was a bit beyond my skills, the keyboard is not as complicated. It took me several tries, but I've got some fairly efficient coding to interpret the keyboard keycode and then send an ASCII code to the processor, while recognizing whether the control, shift, or capslock are active. I am try to toggle the capslock LED on the keyboard, but it's not working yet -- it's not a priority.
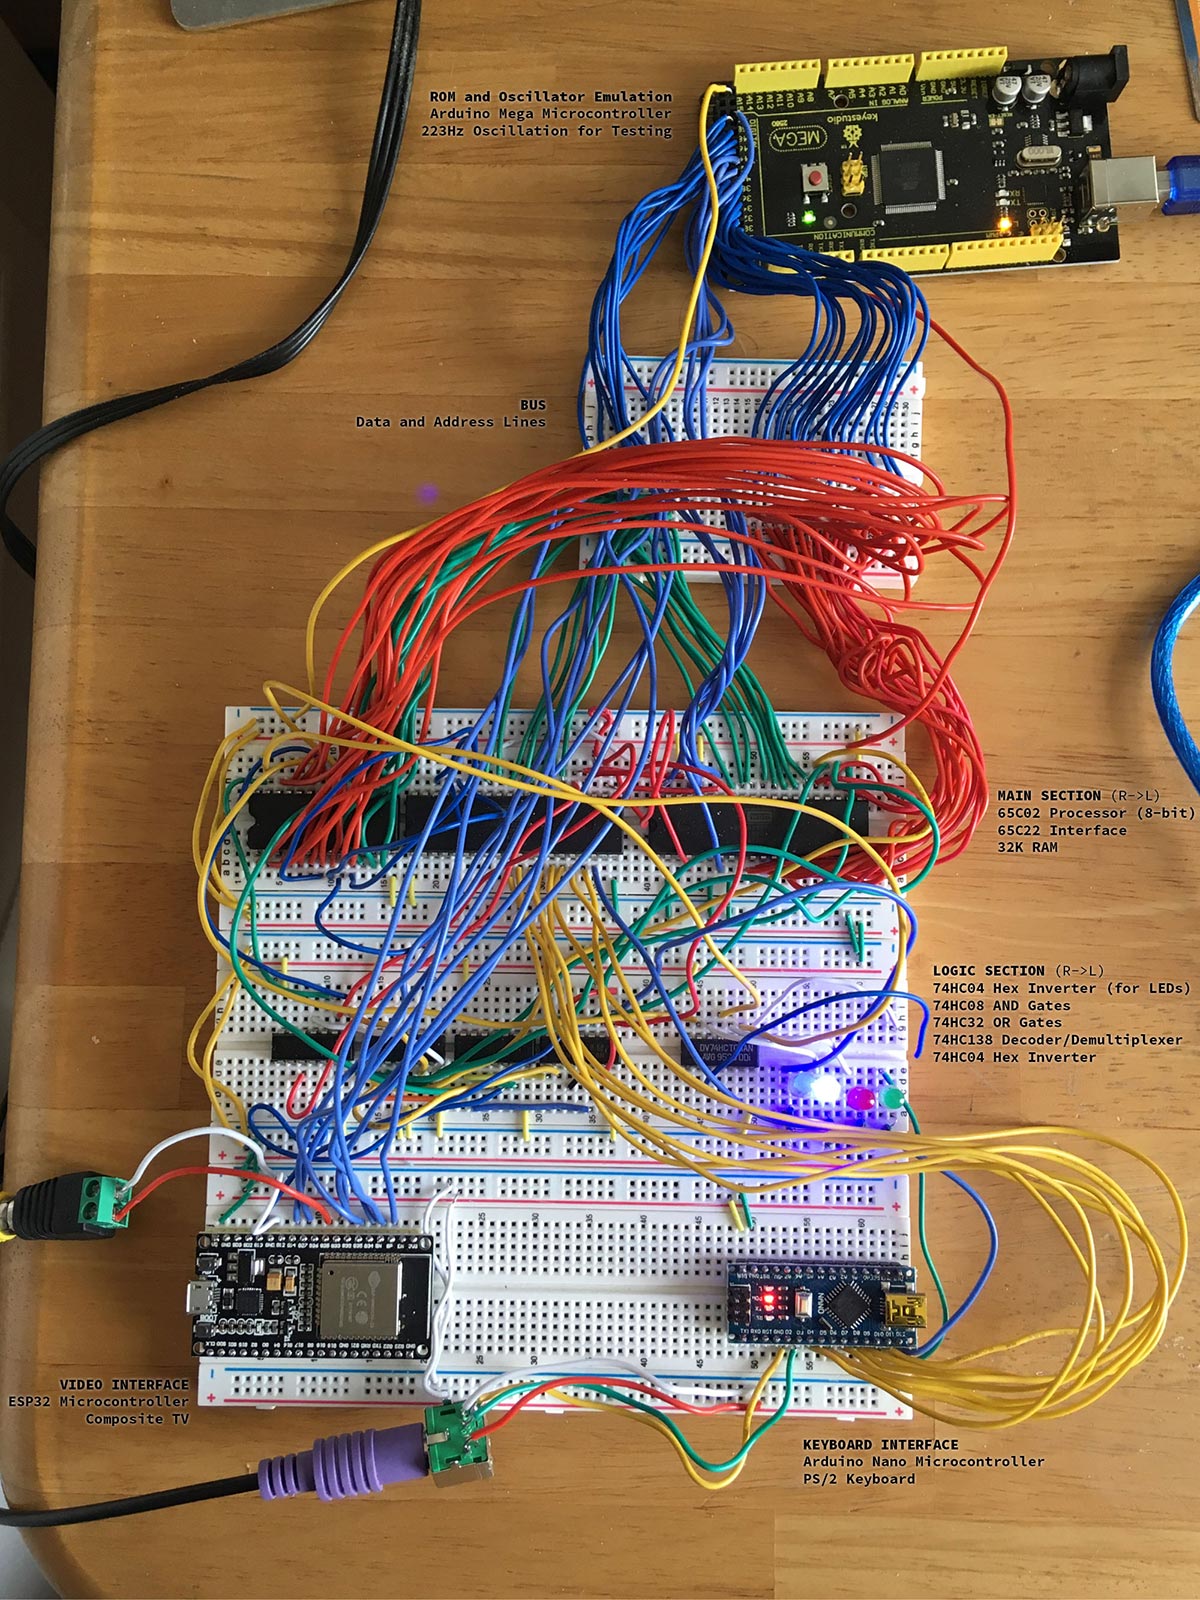
So here's a picture as of this state.
Next, I added a bar-graph LED to help debug. I can output a value to it via the 65C22 I/O chip, just as easily as sending a character to the display. This proved invaluable in programming a system to convert ASCII values entered via the keyboard to a numerical value. Entry can be in either hexadecimal, decimal, or binary. I also reversed the code to send a numerical value to the display in hex format. All of this was done in Assembly Language. It's like taking a step back to the Stone Age after working with Javascript, PHP, and Arduino C++. There are currently four useful commands: CLEAR to clear screen, OUTPUT to display an 8-bit value on the bar graph LED, PEEK to get the Hex value at a specified RAM/ROM address (either a single address or 40 consecutive addresses), and POKE to set a specified RAM address to a specified value.
What's next? I can only get about 100 to 150Hz out of the ESP32 for video processing. It's got two cores, with one processing the video signal. While the second core handles the interface with the processor, I think the timing of the video hampers the ability to give new data to the video core. I'm researching some video chips and currently waiting for one to arrive so that I can play around with it. I would like to get a regular video system working, but this may be the most-complicated aspect, since it's all about special timings. I'm also going to investigate some VGA options. The Arduino Nano should be just fine as a keyboard interface, since it is mainly sending data to the processor, rather than receiving it. Just in case, I designed a keyboard interface using regular chips, although it would mean more work for the processor to interpret the control, shift, and capslock. Ben Eater did a video on this, but again, I decided to figure it out on my own and it is somewhat different from his for the interrupt signal to the processor. I haven't tested it with the processor, but it works with display LEDs. It is only a contingency plan. I've got some ideas for more commands, but I'm thinking that my next step is to program and install a ROM to test it at higher speeds.
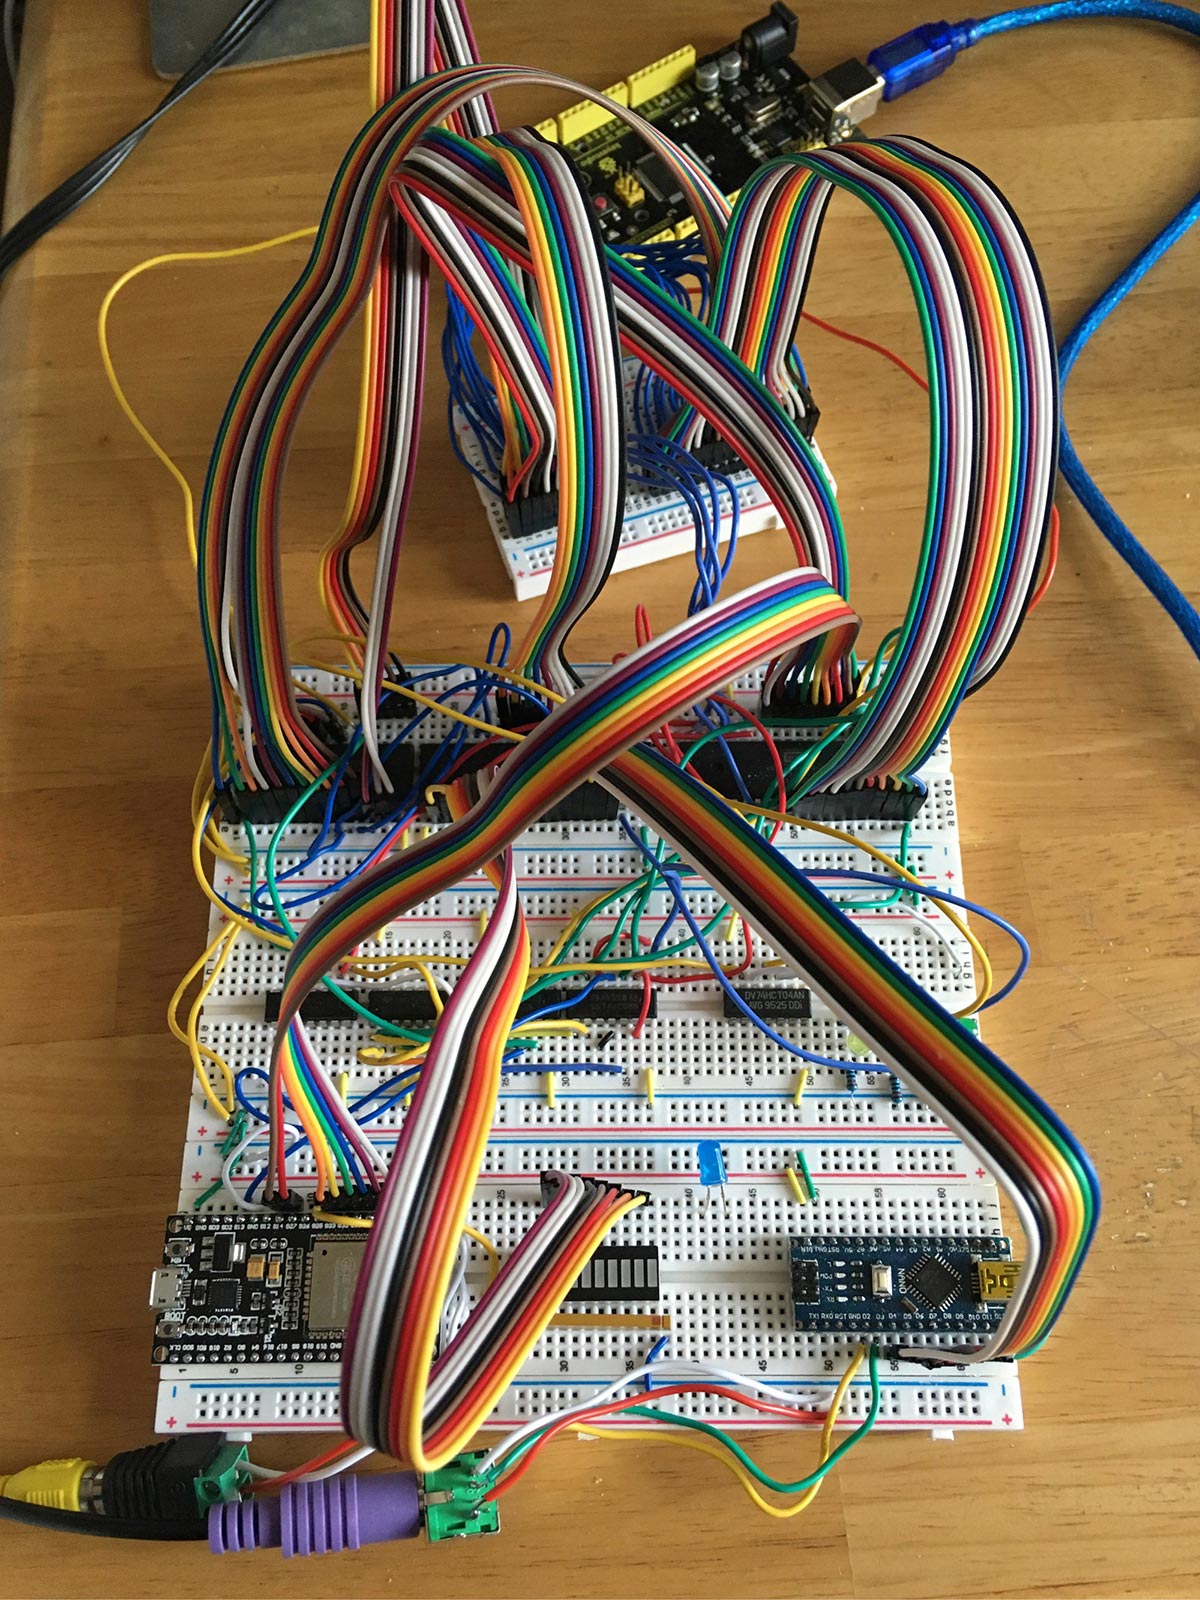
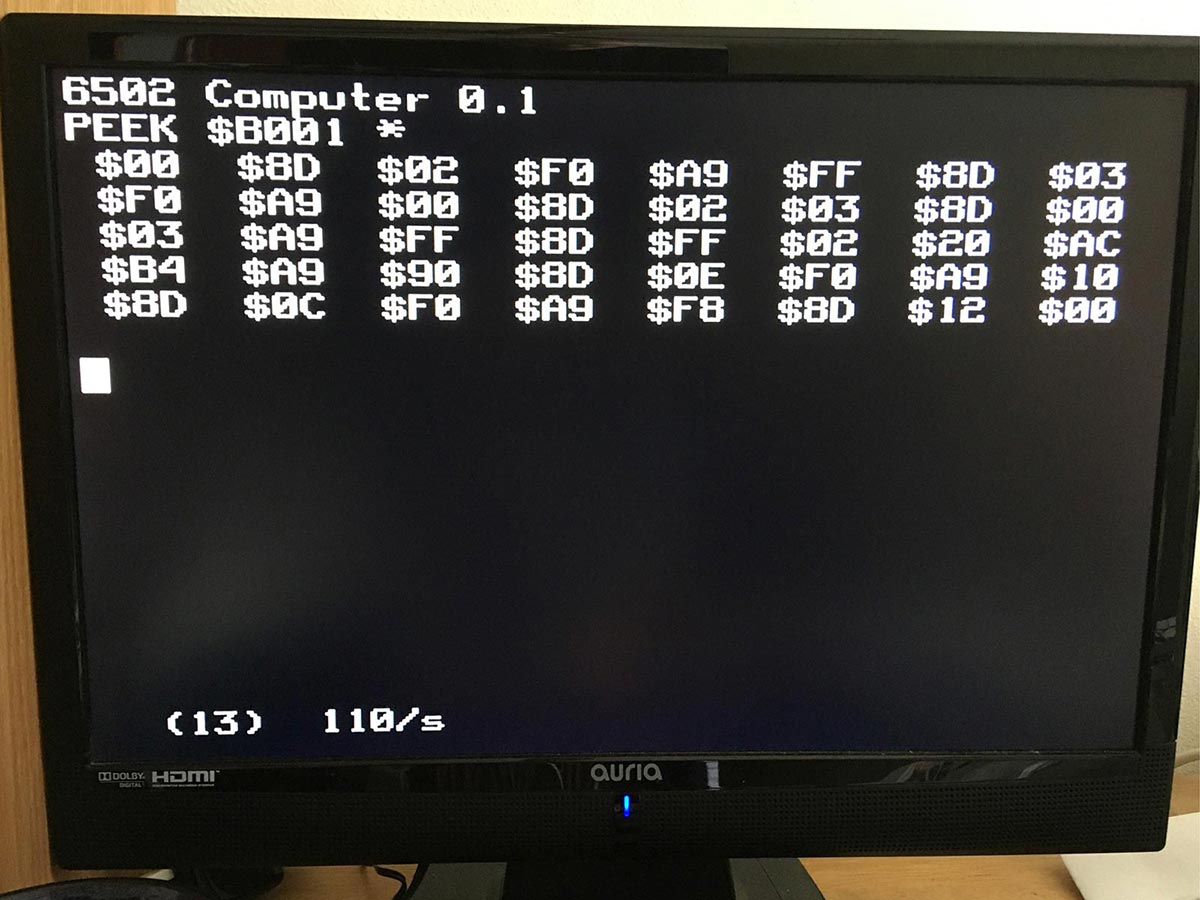
Here's the latest state after I tidied up the data and address bus with Dupont ribbon cable, and what the display looks like.
 |

